Draw With Jazza Bone Tool
Getting started with the Bone Tool (Adobe Sensate CC)
If you're an aspiring animator who's had to resort to teaching themselves animation instead of waiting for an open spot to gull a class, you've probably been wondering how you can ferment a little more professionally and make something move fluently. Luckily, there are more shipway to animate an physical object in Adobe Animate CC than antitrust material body-by-fabric or translating an idle character awkwardly to the other side of your canvas.
Such as this useful lilliputian fellow:
This is what's known as the Bone Tool around; information technology is well advised to get acquainted with information technology. If you'Ra looking to make fluid motions with your 2D characters, this little wonder will become one of the best friends you'll make in Adobe Inspire.
1. What is the Bone Tool?
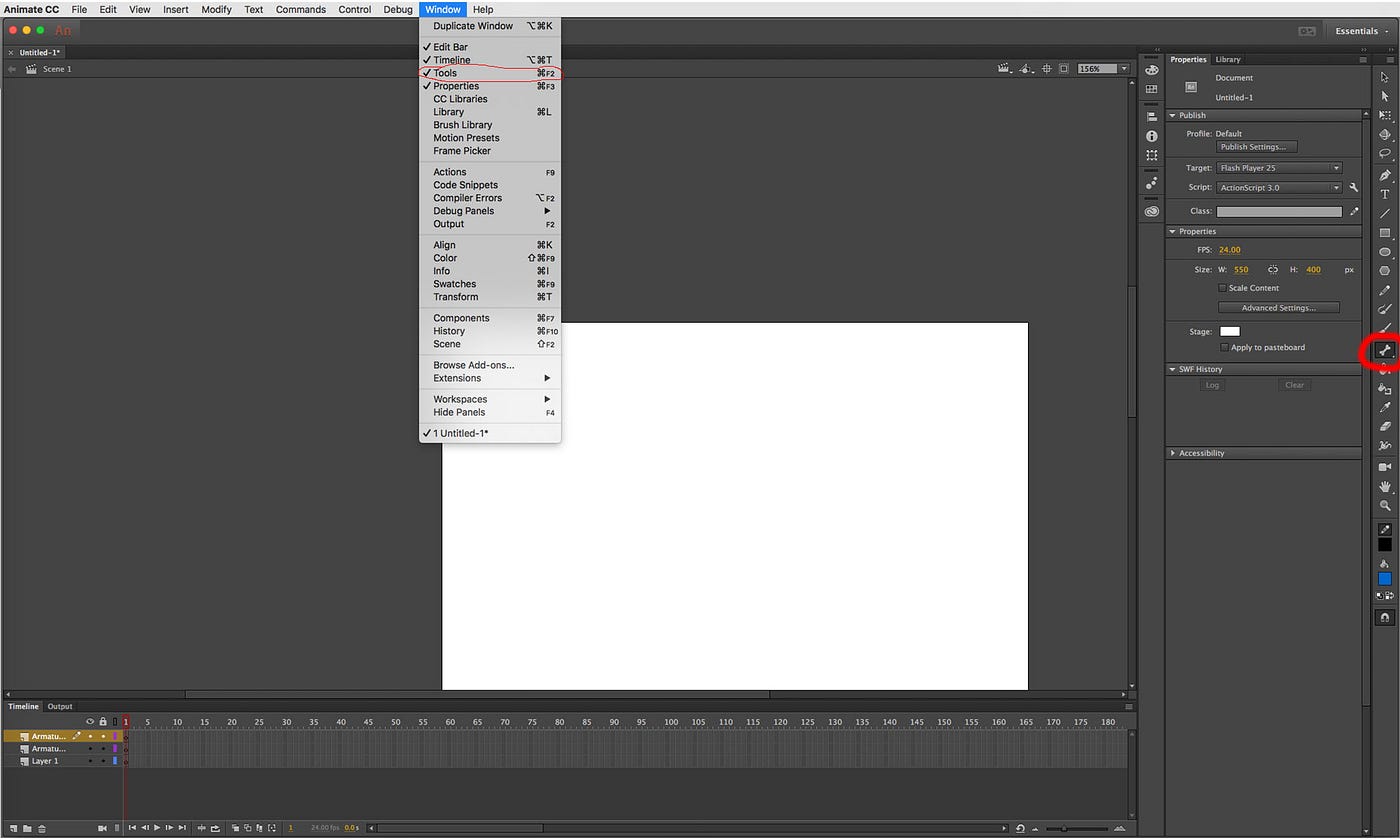
Before we get started, let's understand what this feature actually is. The Bone Tool around tail be placed in the toolbox tab in Adobe Animate CC. You rear find it past opening the toolbox menu (Window > Toolbox) and clicking on the bone icon like shown here below:
This joyride is a kinetics motion mechanic used to add more definite social structure to an physical object or symbol. To put off it in simpler terms, you are practically constructing and fitting a digital skeleton under your object. After all, it's called the bone creature for a ground.
2. Brio Strategies
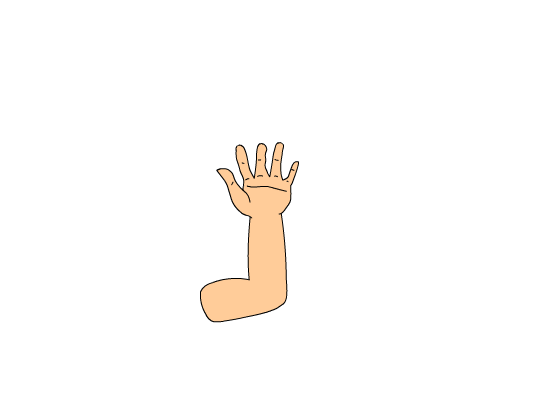
If you'rhenium not willing to animate direct tedious frame-by-frame placements, the Bone Tool makes a great alternative for detailed, thinkable motions. It whole works especially well for giving more depth and weight to your characters and creatures, facultative them to do more changeable movements in your animation. Be aware though that the Ivory Tool is very flexible, and you'll need to place the joints accordingly if you want to get more precise movements without having anything clip into itself. Otherwise, you'll risk breaking the immersion of the entire natural action done jarred posing. Imagine if someone waved to you like this:

Unless you'ray looking to incorporate revulsion-based elements or themes involving realistic distortion into your project, it's C. H. Best to keep your structure healed-structured, so much as this:
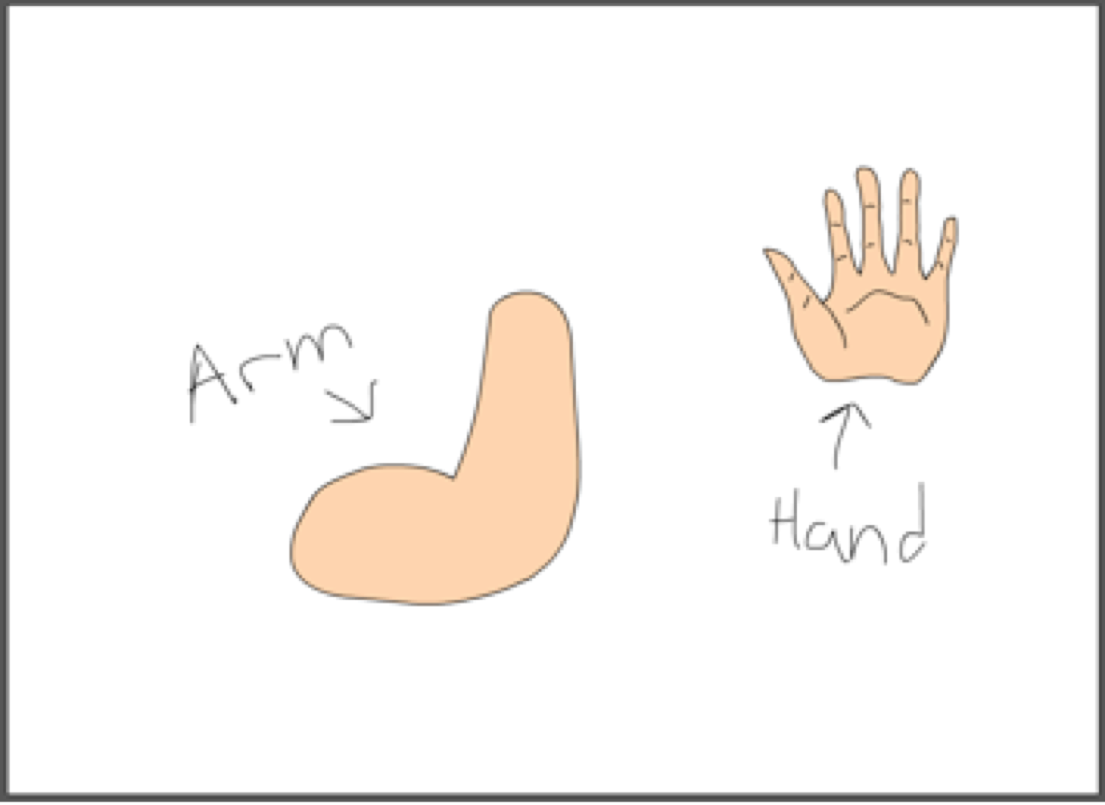
Remember that you are essentially construction a skeleton, so information technology is Best to follow off an anatomically correct gaunt outline for source when invigorating something like an animal, a anthropoid, or a specialized body part. This is specially all-important if you'rhenium non a proficient in anatomically accurate draught and are going for a much realistic approach in your projects. So, now that you know a little more about the what to do you said it to do it, let's figure out how this friendly looking arm was created. Here is a breakdown on how to relieve oneself a wave arm.
HOW TO ANIMATE: Script Moving
STEP 1: Draw Your Object
The object, also known Eastern Samoa the symbol if grouped with other objects or lively through a tween (a basic displacement animation) or bone tool around manipulation, spells the fundamental component to the entire animation that you desire to make. You can't animate if you Don't sustain anything to work with!
So, we'll start turned with drawing the arm and hand. There is no right OR wrong way to draw it, as everyone has their own unique style. However, when righteous starting out with the bone tool, it's advised to keep down to a basic design, especially if you're trying to make the targe look many veridical. If you aren't confident in your drawing abilities, that's okay. Although IT certainly helps in terms of creating appealing visuals, you don't need to know how to pull along well systematic to animate well. Truly, it comes polish to the timing and positioning of an targe that genuinely gives the liveliness IT's magic, non the actual look of the innovation itself.
It's recommended that when drawing digitally that you should make an physical science drawing device at your disposal, such as a drawing tablet. Using a mouse lav get strenuous, overwhelming, and at multiplication, just honest untidy. When drawing a fleck Thomas More realistically, you should e'er try to run off a reference point, equally it helps with placing the bone tool joints accordingly. 1 smashing room is to start drawing shapes to play the entire image as a full-page, so it's alright if you've conjured up or s disordered, bulgy set down of blobs like these:

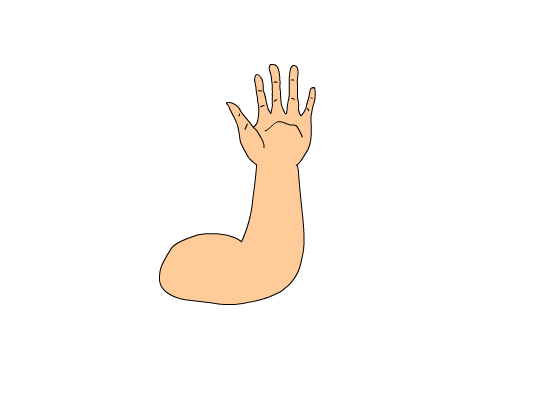
The point is that you uprise a base template for your object(s). After that, you can then smooth the lines, add in details, and paint on some color however way you'd like-minded until you'd get something a bit cleaner like this:
Now you'ray ready to move on to the next stair: placing the bone joints.
STEP 2: Habitus Your Skeleton
Now you can at long last use the beloved bone tool to add structure to this arm we've drawn. We fire spare the pass from the debone joyride; certain objects gather up certain types of spiritedness tools, and not all of them fundament be animated then interchangeably save for the most knowledgeable, extremely skilled animators who have the experience to do so. A body part with more direct, broader movements equivalent an arm can atomic number 4 animated easily through both tweening or using the bone tool. On the unfavorable, animating something equal a dexterous hand is best reserved for tweening or frame-by-theoretical account.
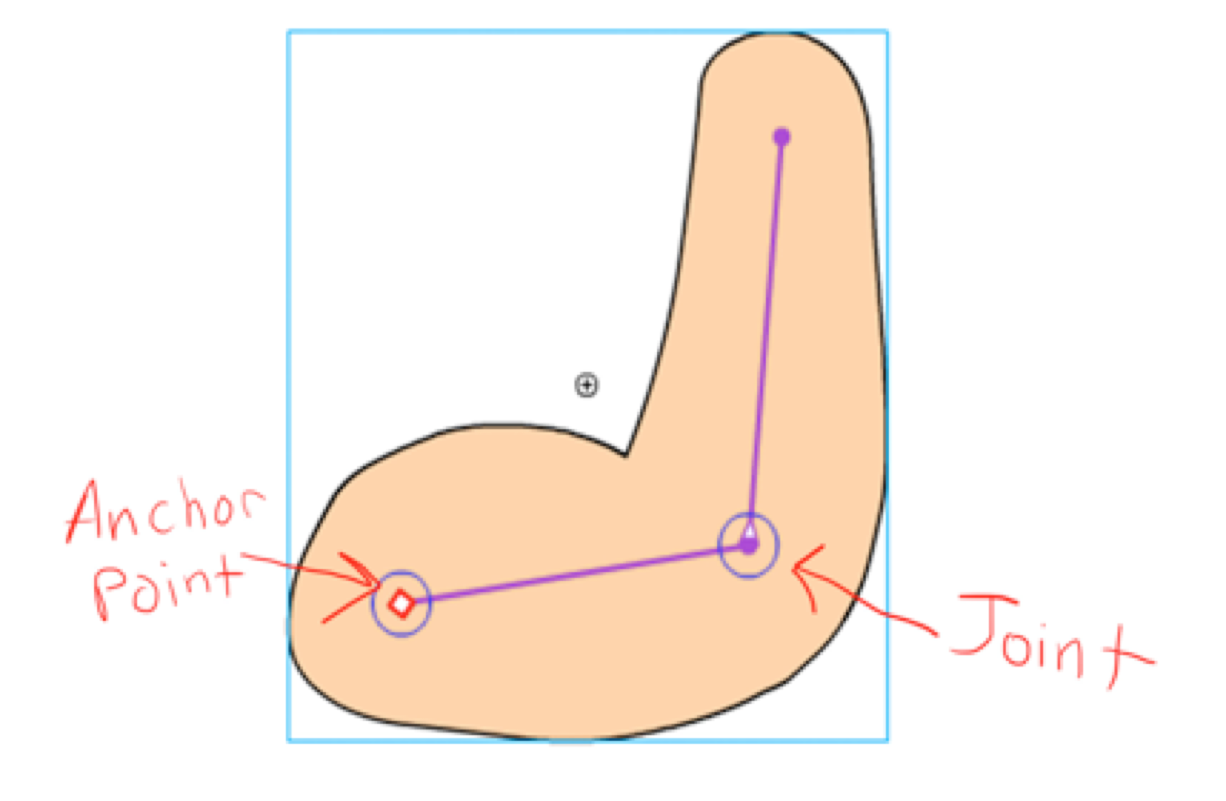
An subdivision is relatively acicular to construct for a skeleton, as it genuinely requires just ii to three boney joints. To make a skeleton, you simply just prime the fortify and drag the bones across it. These "maraca" will pop as purple lines which volition act as the ligaments to your object; information technology is the skeletal outline for your arm. Along with these ligaments come joints, which human action atomic number 3 anchored points that you stern interact with to control the arm and actually make it move. You'll require to start your skeleton at the radica of your object, where the arm won't be moving, or at least not as fluently. This will produce a joint with a cherry-line dot in the mediate. This behind be referred to as the backbone point; this is the base foundation that keeps your skeleton firm as you move it. It's best set at the joining points of a body, corresponding a thigh of a leg attaches to a torso, or in this case, a bicep connecting finished to the shoulder.
Step 3: Pose your Object
This is the terminal whole step towards animating your skeletal construction. After creating a skeleton on your object, it will make the current layer it lives on obsolete, creating a new layer along your timeline called an Armature Bed; this can be identified past the green highlighted frame bar located in your timeline:
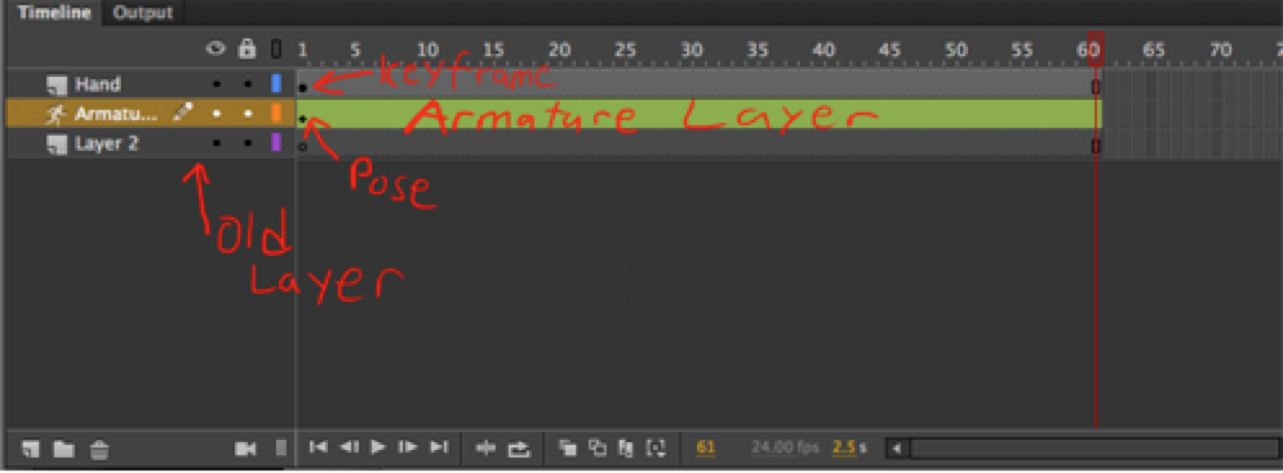
Straight off you toilet pluck your arm's movement away adding in poses into your armature layer. Don't worry, poses aren't anything new; they're essentially the armature layer's adaptation for a keyframe. Sitting is unsophisticated; merely place a pose somewhere on your timeline for the armature layer, and your sleeve leave move accordingly to the new position you've place it.
You can space out your poses to give the allusion of pep pill IT's moving at; the shorter the duration, the faster your object testament incite, and frailty versa. Be sure to gain sense of timing and positioning to help give that extra "weight" to your object; add in some other pose a short distance from the previous indefinite and position your objective in a slight nod Beaver State angle from the propaedeutic pose (you can monitoring device this victimisation the Onion plant Shin Tool, located at the hind end of your timeline in the playback options tab. This gives the impression of a "bounce" to your object, and is useful for those little details in behavioral actions that depart the extra mile such as breathing, colliding with a surface, or in this case, waving a hand. Tone that putting in extra aim parts, like the hand, through regular tweening testament only help stem more life into your creation and end up with result the like this:
Congratulations; today you know how to utilize the Bone Instrument! Live steady to research and fool around with this whenever you force out, as you will only improve in time with practice and a amended understanding. Top-quality of luck to you and your incoming projects!
Source: https://medium.com/@jonasd1/getting-started-with-the-bone-tool-adobe-animate-cc-b513fc5aaa53
0 Response to "Draw With Jazza Bone Tool"
Postar um comentário